
How to photograph crafts
Do you have beautiful products that you lovingly hand craft and sell? That you are proud of and passionate about? That people love when they see them in your shop or craft stall?
Now for a harder question. Do the photographs of your gorgeous products do them justice? Do they stand out from the competition and shout "Buy ME!"?
If not, don't lose heart, as it's not hard to learn how to photograph crafts like a professional. Here are my top tips:
Get a decent camera and learn how to use it.
Whilst it is possible to take good photos with a smartphone with a bit of effort, it's much easier with a proper camera - ideally one with interchangeable lenses. The choice these days is between a D-SLR camera or the smaller "mirrorless" cameras. An entry level D-SLR will cost around £250-£300. Mirrorless cameras are slightly more expensive. All come with a kit lens (basic starter lens) that will allow you to shoot surprisingly close up and will blur the background to some extent. A great addition would be a 50mm f/1.8 lens - a steal at around £80-£100 that gives amazing blurred backgrounds and lets in more light - very useful when you are shooting indoors. You could also check out second hand cameras and lenses from a reputable supplier like The London Camera Exchange.
Shooting on AUTO just won't give the results you want, as you're relying on luck rather than skill. If you're mainly shooting indoors you need to know how to get bright images without using the flash. The best photos have depth and blurred backgrounds that are hard to achieve on AUTO, but surprisingly easy if you are just shown how.
It's OK to take the occasional photo with your smartphone and post to social media, but apply some of the tips below to make sure it's as good as it can be.
Turn off your flash and set up your shot near a window so that you can photograph using natural daylight.
Simple set up near a window.
Turn off the electric lights and make sure you're not in direct sunlight. If it's very bright outside you could put up a sheer curtain to diffuse the light a little and make any shadows softer.
One of the biggest benefits of using natural light is that the colours on your product will look as they should. This is critical when customers are buying from your website and expecting the delivered product to look very close to what they saw when they ordered. If the colour doesn't look right you could try checking the White Balance setting on your camera. Which setting gives the most accurate result? For me it's usually Auto White Balance (AWB) or Daylight.
And that's it in terms of lighting! It's that simple - you don't need studio lights even on the dullest winter day! I sometimes use a piece of white card to reflect light from the window back onto the product. All the images in this blog were shot this week with this and similar simple set ups.
Carefully select your photography sample.
The product (and packaging if relevant) should be pristine and perfect. You'll avoid lots of editing headaches later.
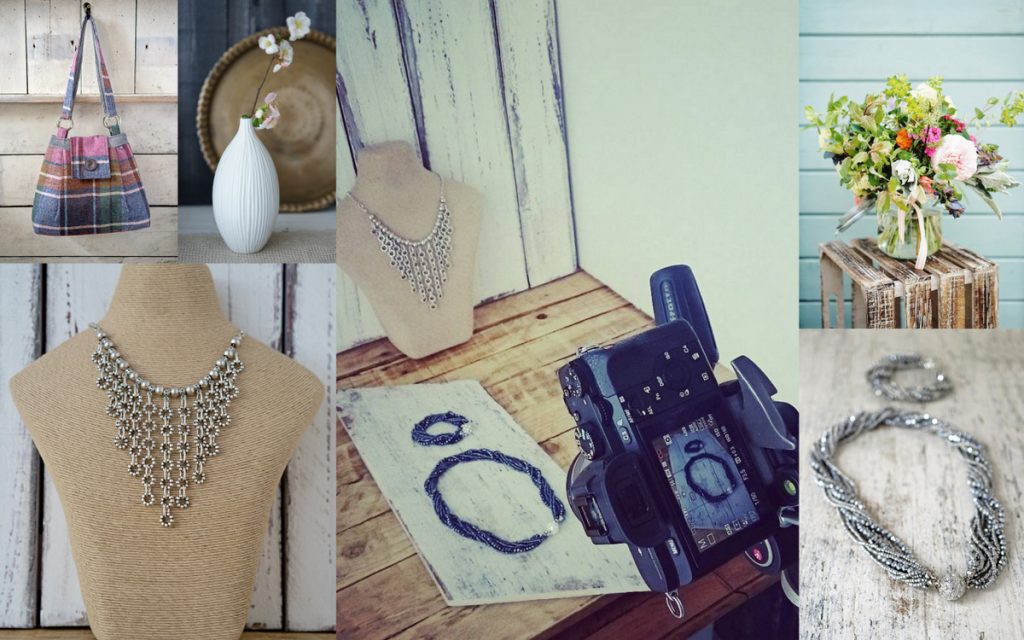
Make or buy some simple natural backdrops.
Here are some tips to bear in mind:
- You can make them very cheaply yourself from old palettes or from tongue and groove wood panels from a hardware store. Get a distressed look using chalk paints. There are lots of tutorials online on how to create wooden photography backdrops.
- Buy MDF board and glue hessian to it. Use both sides of the board, Paint some of the hessian. Create interesting textures.
- Get free wallpaper samples from your hardware store. There are lots of wood, stone and metal effect papers around at the moment. Glue them to wooden boards so that last a bit longer.
- Buy tile samples for smaller products like jewellery.
- Avoid shiny surfaces as they cause reflections.
- Go large than you think you'll need to allow lots of camera angles.
Use some simple styling to display your product at its best.
It's OK for a product shot to include a few styling props; they make the image aspirational and give it a context. People will aspire to buy your product and are able to see how it will fit into their home. Unless the retailer specifically demands it I avoid shooting with a plain white background. It can be very difficult to get it pure white and to do it consistently. Aside from the technical difficulties it can look very bland and stark.
Use relevant props to style your shot.
A few pointers to remember when styling with props:
- Your product is the hero of the shot! You don't want people asking where they can buy the nice tea light holder in your shot instead of your product.
- Use props that are relevant to your product. If it's hand stitched include a scrap of fabric, ribbon or scissors.
- Less is more. Don't clutter the shot with too many props.
- Use colours that compliment the product.
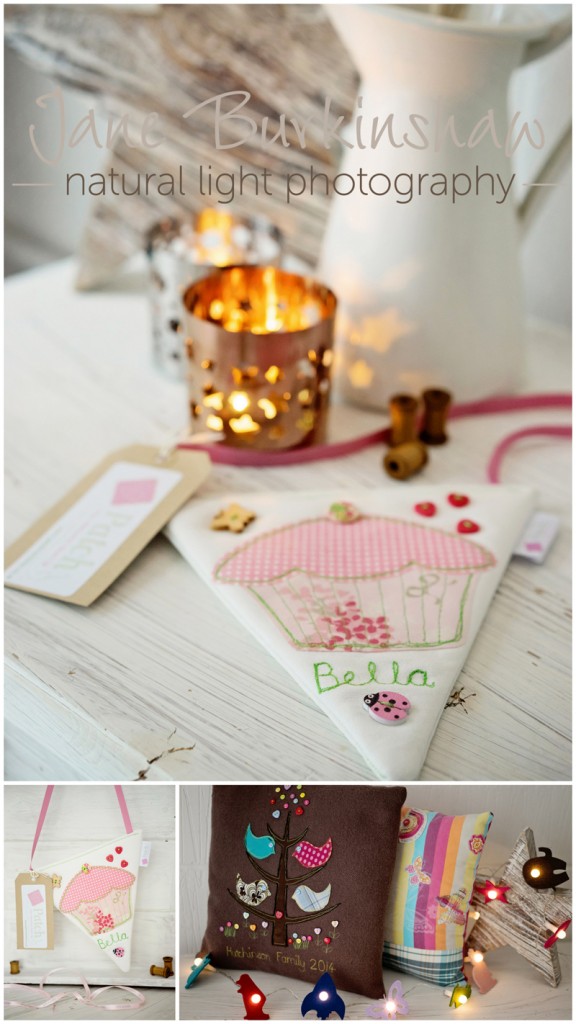
- Use a bit of artistic licence. It was hard to photograph the door hangers hanging on doors so I placed it on an empty white drawer. The image still conveys a hanging product.
- Take shots from a number for different angles until you find one that works.
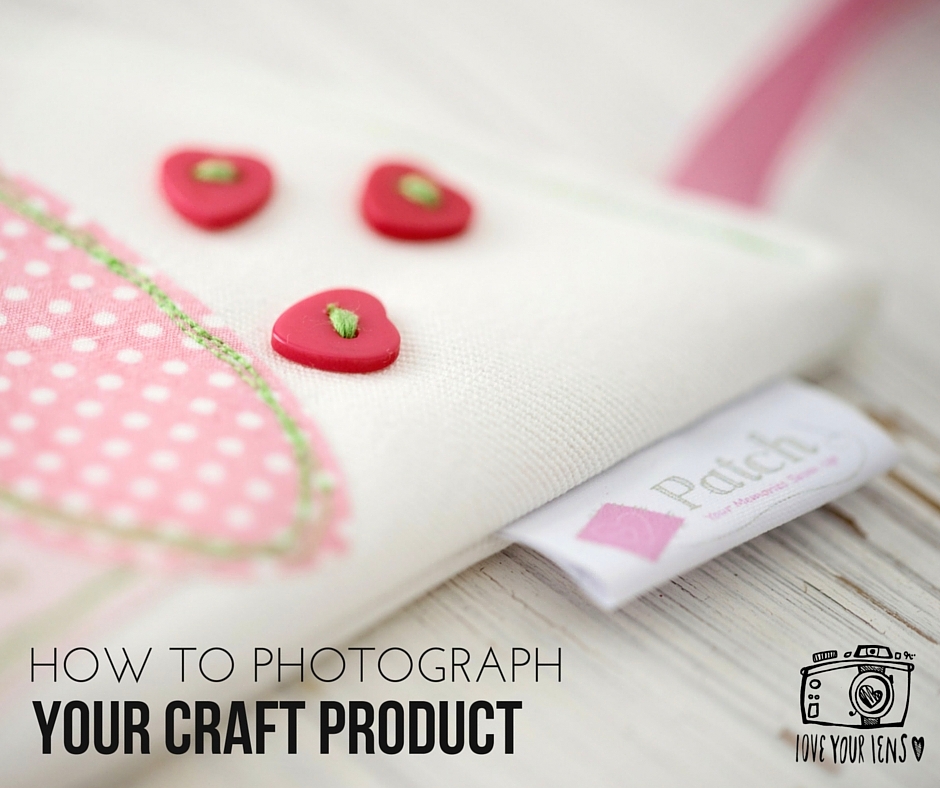
Shoot the details that make your product special.
Take close up details of labels, stitching, texture etc to show how well made and thoughtfully designed your product is. This adds value and authenticity.
If your product arrives beautifully packaged, photograph that too.
Leave space for text.
Purposely leave a blank area in your image for any text you might want to add for social media. See below for a great app to add text and graphics.
Edit your photograph to give it an extra "polish" and WOW factor.
Most photographs benefit from a little editing to enhance them. These are the elements I usually slightly tweak:
- Cropping - just a little cropping to get rid of any unnecessary areas.
- Exposure - I like my photos to be nice and bright and usually go towards slightly over-exposing.
- Contrast - gives your photo a little extra punch. But I like some of my images to be quite soft and airy, so I reduce the contrast a little for that style.
- Saturation - boost colours a little.
- Re-size for the end use. This is REALLY important. You need to know your pixels and how many you need.
PicMonkey is a great website where you can edit your images for free. (There are paid-for features).
Add text and graphics to give your images extra presence on social media.
Canva is a free website where you can easily create lots of different marketing materials and correctly sized social media posts. It makes you look like a graphic designer and is well worth taking a look. I couldn't live without it!
ALWAYS watermark your photos.
Don't go to all that hard work just for someone else to take your photo and pass it off as their own work. Also, if someone decides to share or pin (on Pinterest) your image, your branding stays with it and people can easily find you.
The products featured in this blog are made by a very talented lady running a business called Patch.
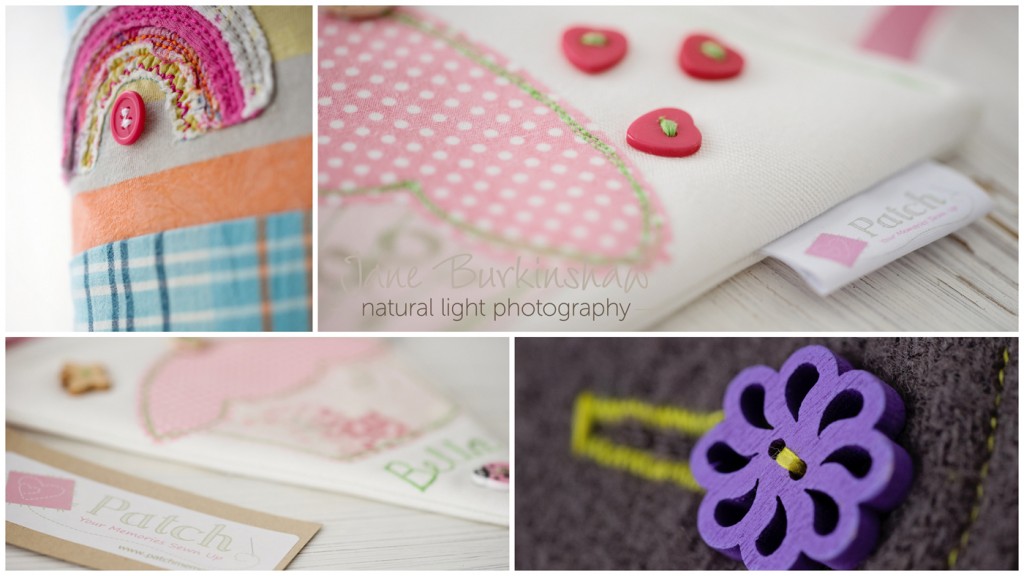
Photograph all the details that make your product special.
I run courses and offer one to one tuition to bloggers and business owners, so if you’d like help photographing your product then click on the links and take a look.
Did you like this blog post or find it useful? If so, please leave a comment, sign up for email reminders at the top of the page or share it with your friends (or even better, all three!!). Thank you – Jane ![]()
Really helpful blog Jane. So looking forward to my tuition!
Thanks Lorna. Looking forward to seeing all those cute handmade children’s products!