

What does a polarising filter do?
A polarising filter is a really useful addition to your kit if you enjoy landscape photography. It works by reducing atmospheric haze and cutting out reflected light - both of which can make a big difference to your images.
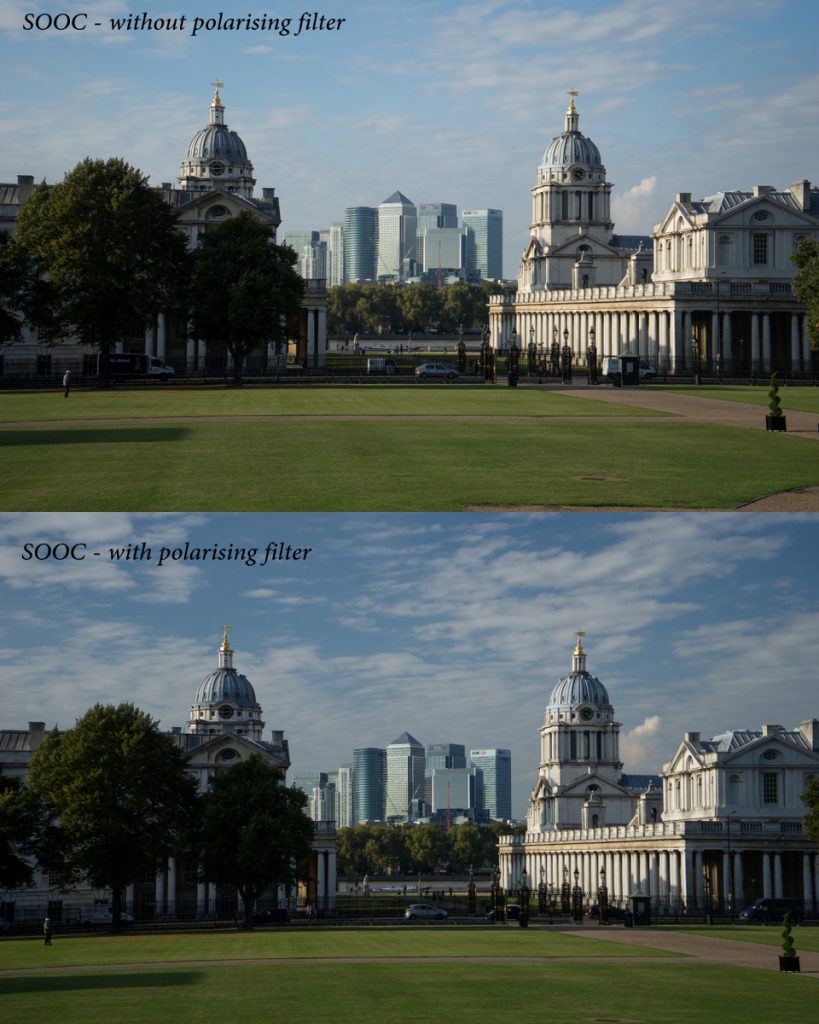
One of the most noticeable effects is in the sky. A polarising filter can add more detail, revealing clouds and deepening the blue tones. In the images below, you can clearly see the difference. These shots were taken just seconds apart and are straight out of camera (SOOC), with no editing.
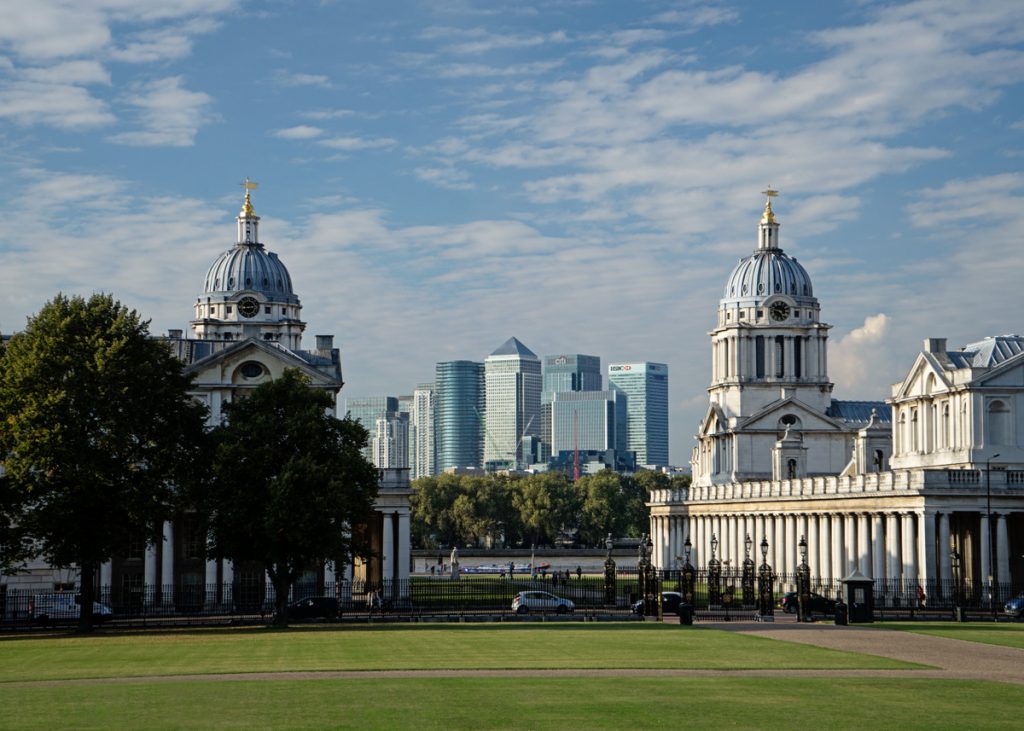
Here's my final - edited - image with a slight crop to make the domes in the foreground balance and frame the towers of Canary Wharf in the background.
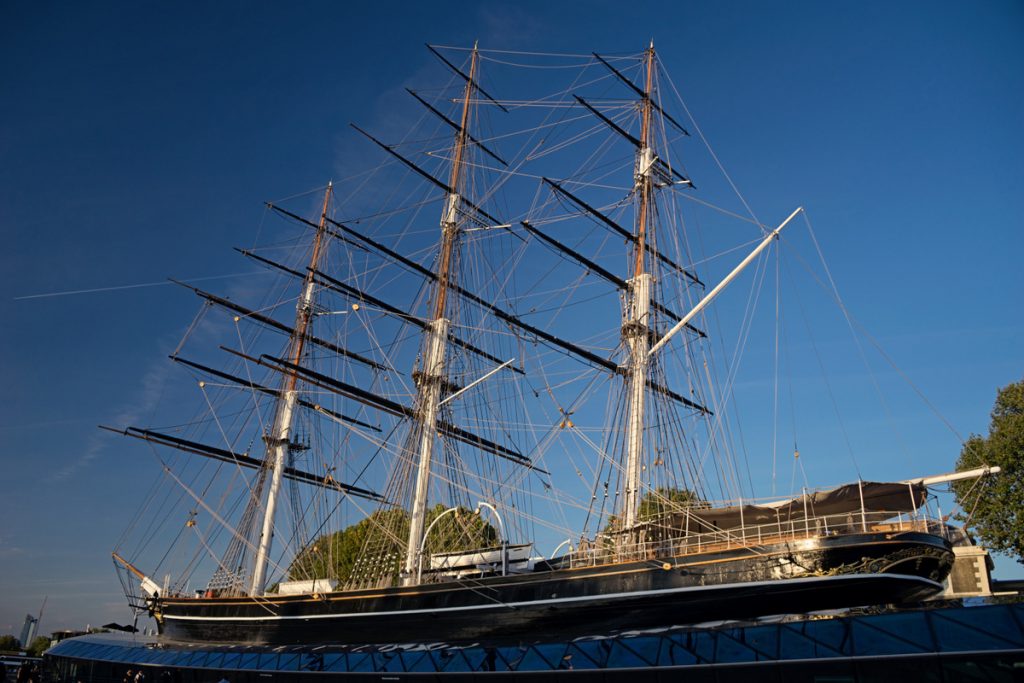
Polarising filters can really intensify the blue colour of the sky, as in this photograph of the Cutty Sark at Greenwich, taken at about 5.30pm as the sun was low in the sky.
How to Use a Polarising Filter (Step by Step)
To use a polarising filter, simply screw it onto the front of your lens. You can attach it directly, or screw it onto a UV filter if you already have one in place.
Once attached, you’ll notice that the filter can rotate. As you turn it, you’ll see the effect change - particularly in the sky, where the blue tones deepen and reflections are reduced.
For the strongest effect, position yourself so the sun is at roughly 90 degrees to your subject — in other words, to your left or right rather than directly in front or behind you.
When buying a polarising filter, make sure you choose the correct size for your lens. You can find this by looking for the diameter symbol (Ø) on the front or side of the lens or on the under side of the lens cap.
When to Use a Polarising Filter
Because a polarising filter reduces reflections, it’s particularly useful when photographing water. It allows you to see beneath the surface, rather than just capturing glare on top.
It’s also helpful in many situations where you want to reduce unwanted reflections - for example on glass, wet surfaces or shiny objects. Used carefully, it can make colours appear richer and help bring out detail that would otherwise be lost.
A Quick Tip for Clear Skies (Watch Your Sensor Dust)
One final tip when photographing those deep blue skies and clearer scenes. If you have any dust on your camera sensor, this is exactly where it will show up - particularly in areas of smooth sky.
Take a look at this shot, also taken at Greenwich at sunset.
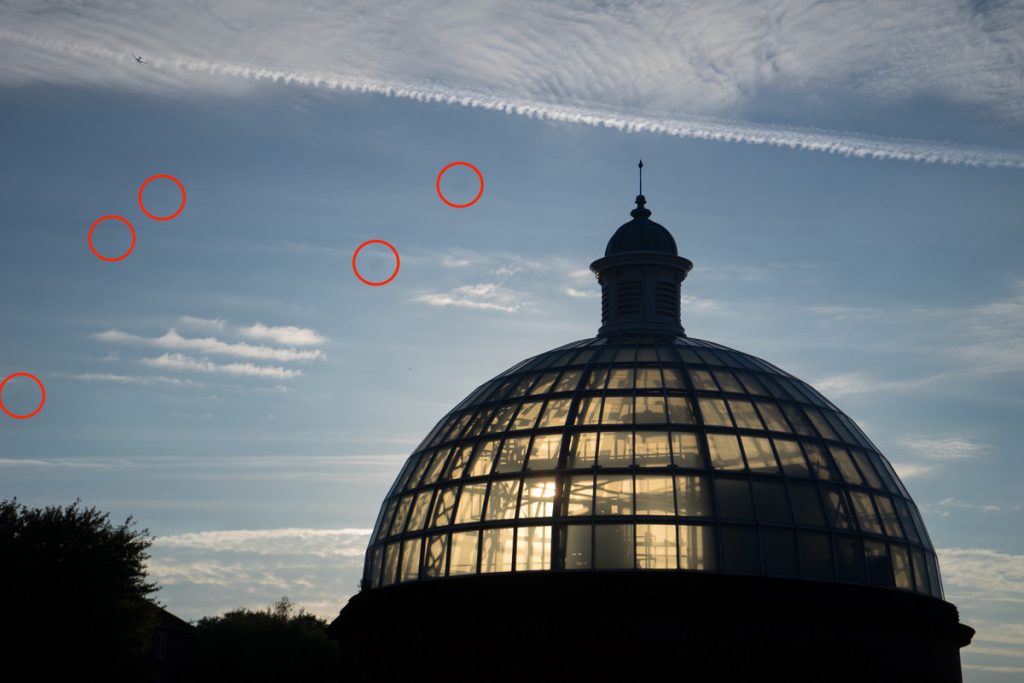
’ve circled all the grey, fuzzy spots I could immediately see, but I’m sure there are more if I looked more closely.
They’re relatively easy to remove in Photoshop or other editing software using healing or cloning tools, but they’re also a clear sign that the sensor needs cleaning. I’ll be taking mine into a camera store to have it done - it usually costs around £35-£45.
Some people do clean their sensors themselves, but it’s not something I’d recommend, especially on a camera worth £1000.
This picture was taken using a big aperture - around f/5.6. If you shoot with a smaller aperture (wider depth of field) the grey blurry blobs become smaller, more defined and more noticeable grey dots and you will spot more of them too.
Learning how to use a polarising filter can transform your photography, helping you capture deeper colours, clearer skies and more detail straight out of camera. It’s a small addition to your kit, but one that can have a big impact.
If you’d like to build your confidence with techniques like this and get to grips with your camera settings, you can find out more about my photography workshops here.
No comments yet.