
Moody food photographs are all over Instagram and Pinterest and it's a style that looks set to stay for a while. So, it's no wonder that lots of people want to give it a go. However, unless you know a few techniques and tips, it can be hard to achieve the look.
In this blog post you will learn how to take moody food photographs with natural daylight and a smartphone - yes, seriously, just with a phone!
Here's what you will need:
- Your foodie subject. Make life easy for yourself by starting out with something that won't go cold, melt or congeal. Whole fruits or veg, cookies, cupcakes etc are all perfect. Once you are more confident, you can move onto hot or cold food that requires you to work quickly.
- Props that help create your story. If you are struggling for ideas, take a look at Instagram and Pinterest, but keep your set up as simple as possible.
- A smartphone. If you are shooting with a phone, you will get best results if you shoot a flat lay i.e. from directly overhead. This is because it's hard to get any sense of depth or blurred background with a phone. Of course you can use a camera if you wish and shoot from whatever angle you like.
- A suitable backdrop - something textured and dark that suits the mood and subject. For more information take a look at my favourite food photography backdrops.
- Black foam board from a craft store. I usually get two sheets and split one of them into two, so that I have three in total.
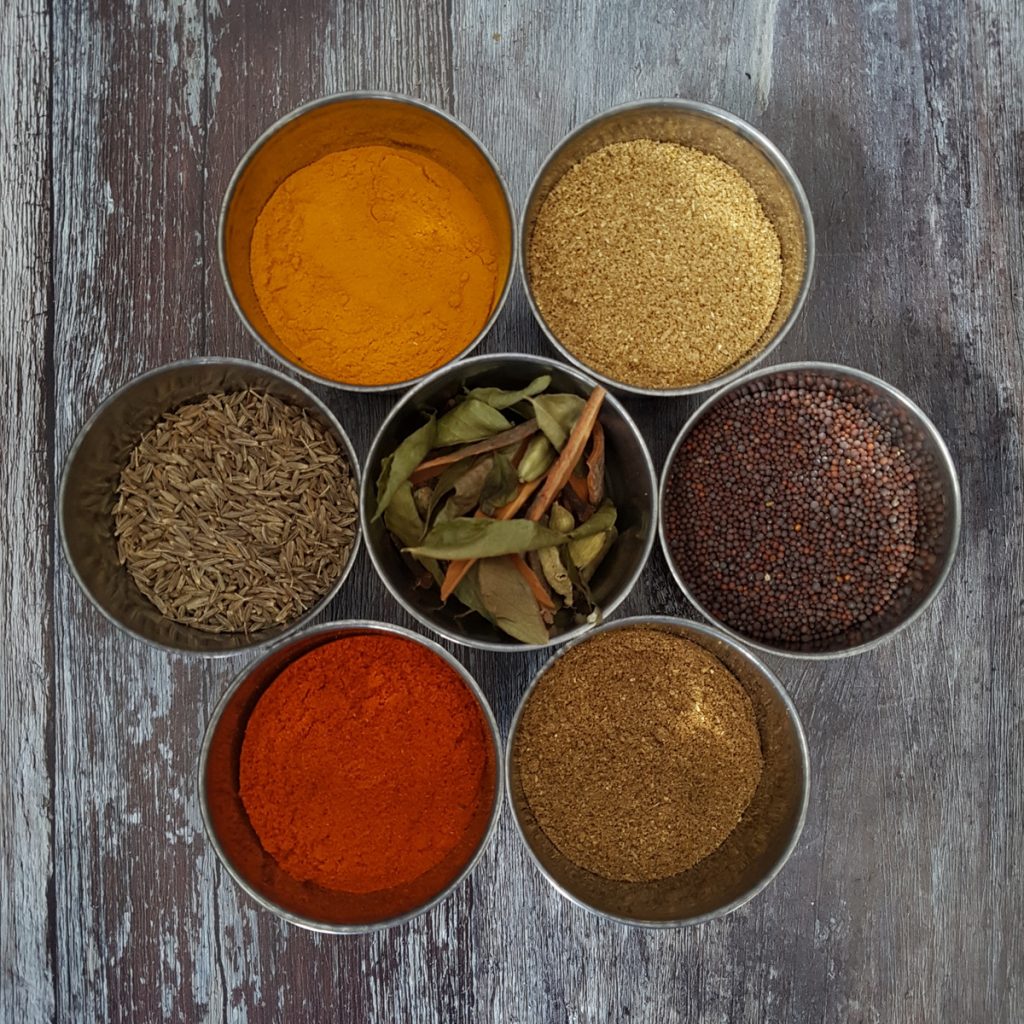
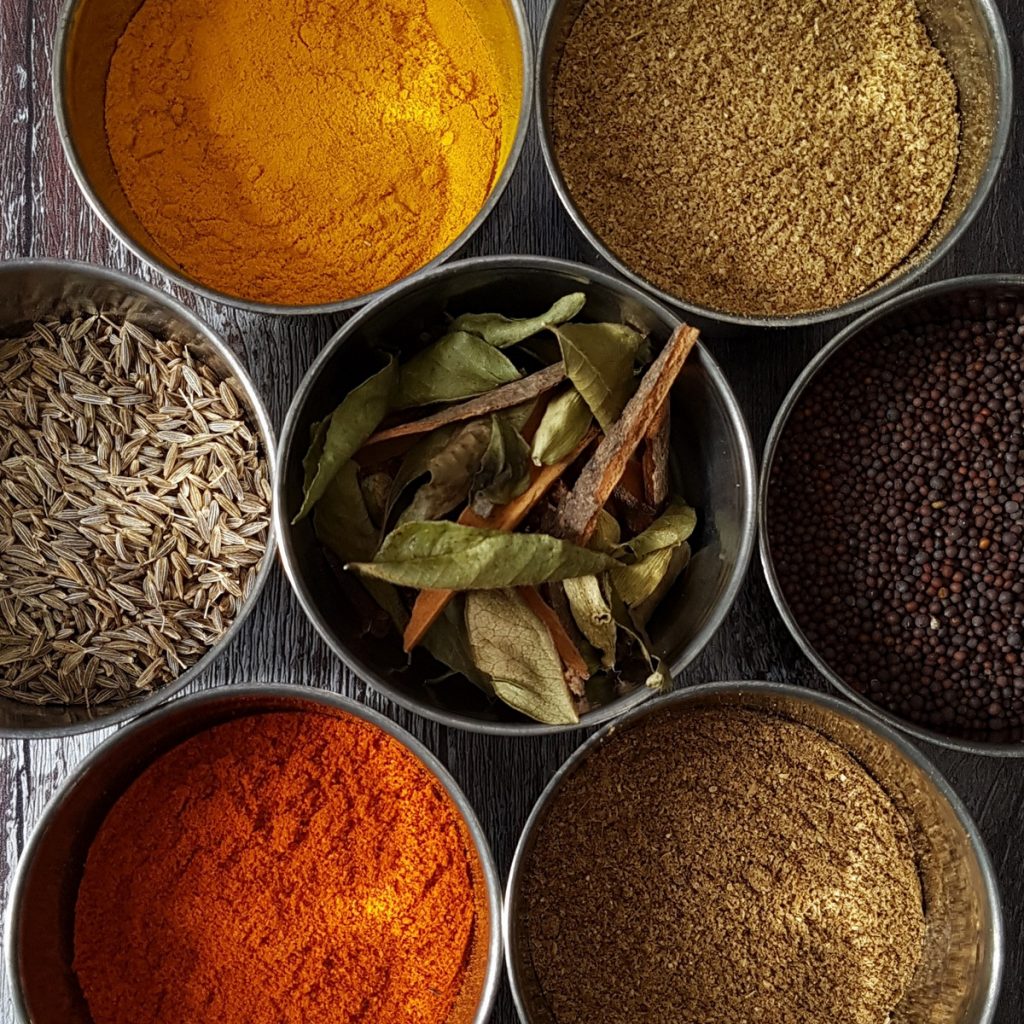
In this example, my foodie subject is a lovely set of spices in silver circular containers.
 I've used a printed photo board that looks like dark wooden planks. I bought this (and lots of others) from Photo Boards. The boards are lightweight, wipe clean and the textures are to scale. PhotoBoards has now closed so see 'Black Velvet Styling' or Google 'photography backdrops' for alternatives.
I used my Samsung Galaxy S7 to take these shots. It's amazing and I LOVE using it for flat lays. I do use my 'proper' camera to shoot from other angles, as I like to get soft focus backgrounds and the phone can't do that.
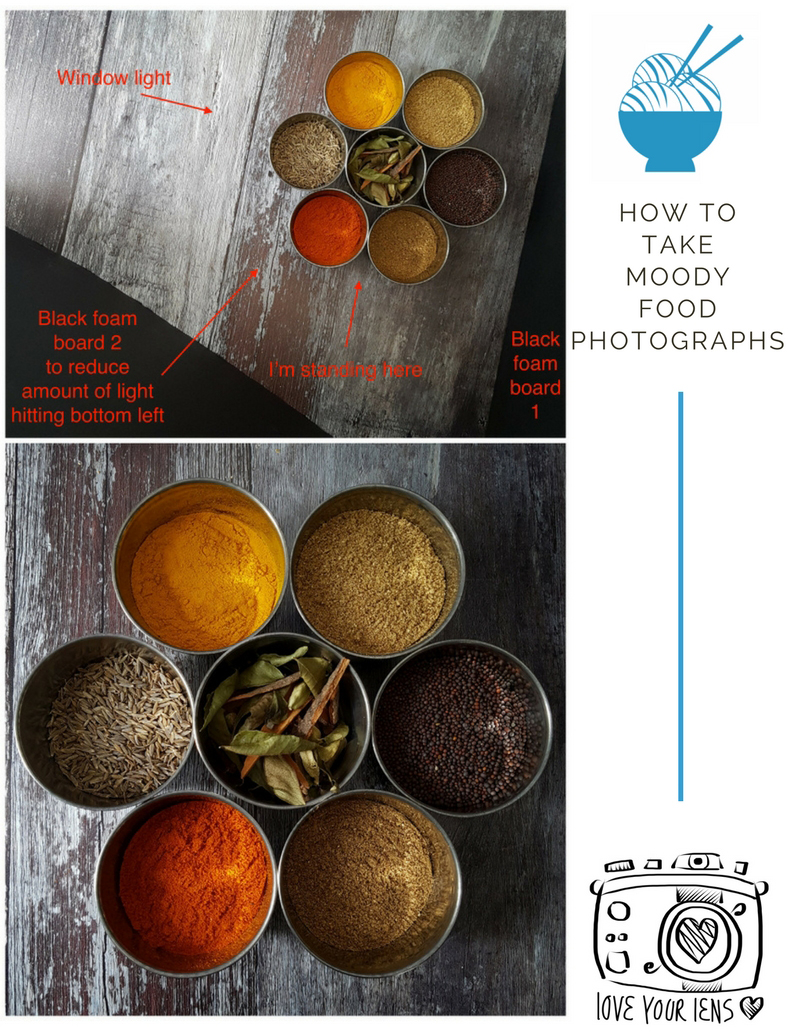
The black foam board is used to create dark shadows on your subject - the opposite of white foam board, which is used to bounce light from the window onto the subject.
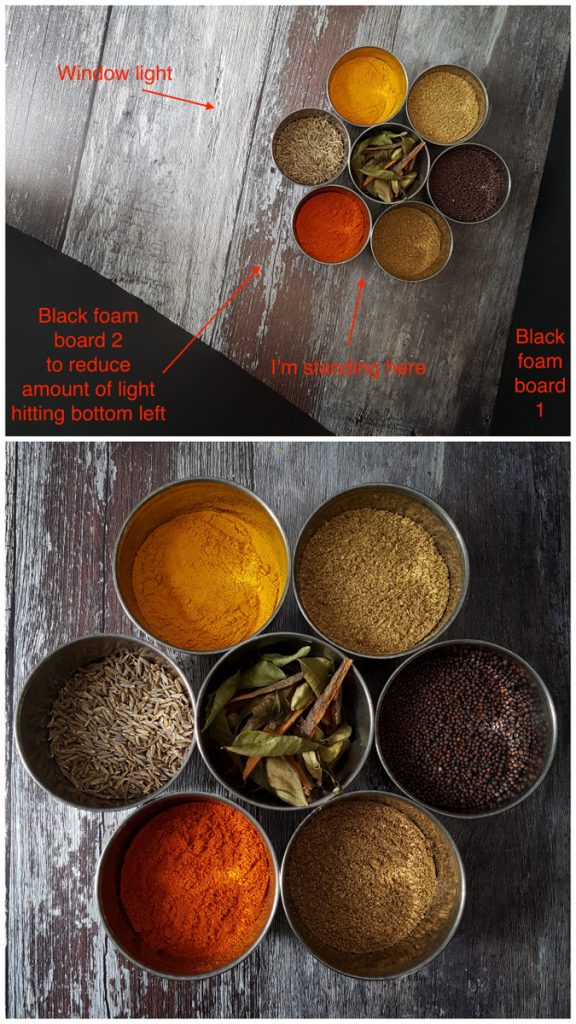
This is my initial set up, with the foam board to the right and natural light from the window on the left. A net curtain is filtering the light.
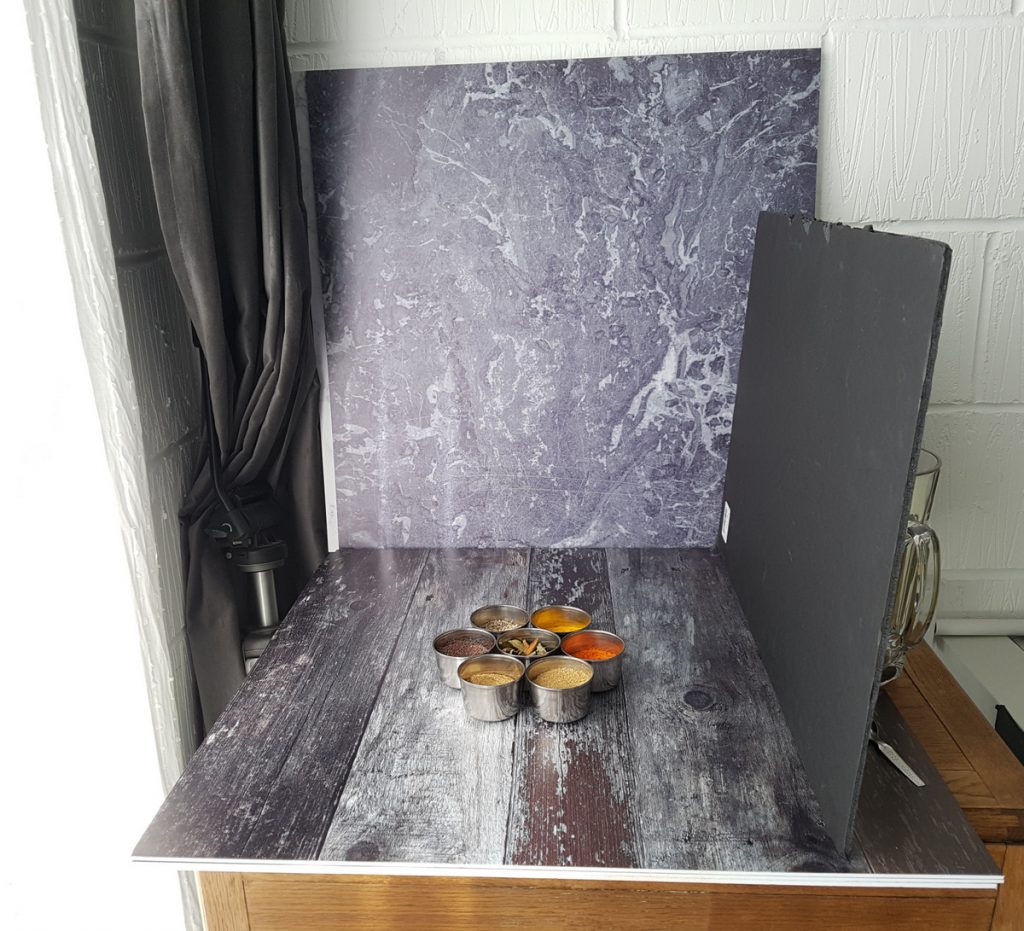
I don't have a set way to light a subject, as every set up is different and the light can vary so much, depending on the time of day and the weather! So I experiment, trying different things until it works.
Exposure: when you are photographing dark subjects the camera or phone will get it wrong and over expose it (make it too light). So you need to correct this before you take the photograph.
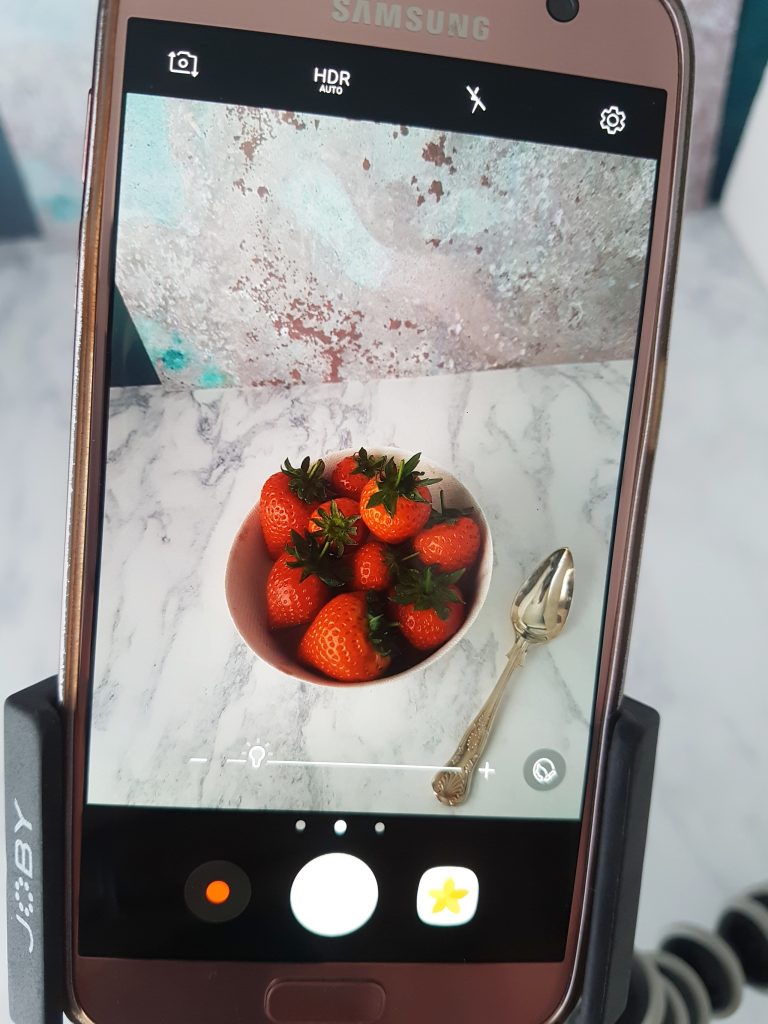
For smartphones: tap on the screen to focus the picture. Depending on your brand of phone, you will either get a sun symbol (iPhone) or a bulb symbol or similar along a line. Slide your finger along the line to brighten or darken the image. It's as easy as that to change the exposure. Some smartphones let you set the focus and set the exposure separately.
This initial shot above looks ok, but it's very bright to the left hand side, despite the net curtain filtering the daylight.
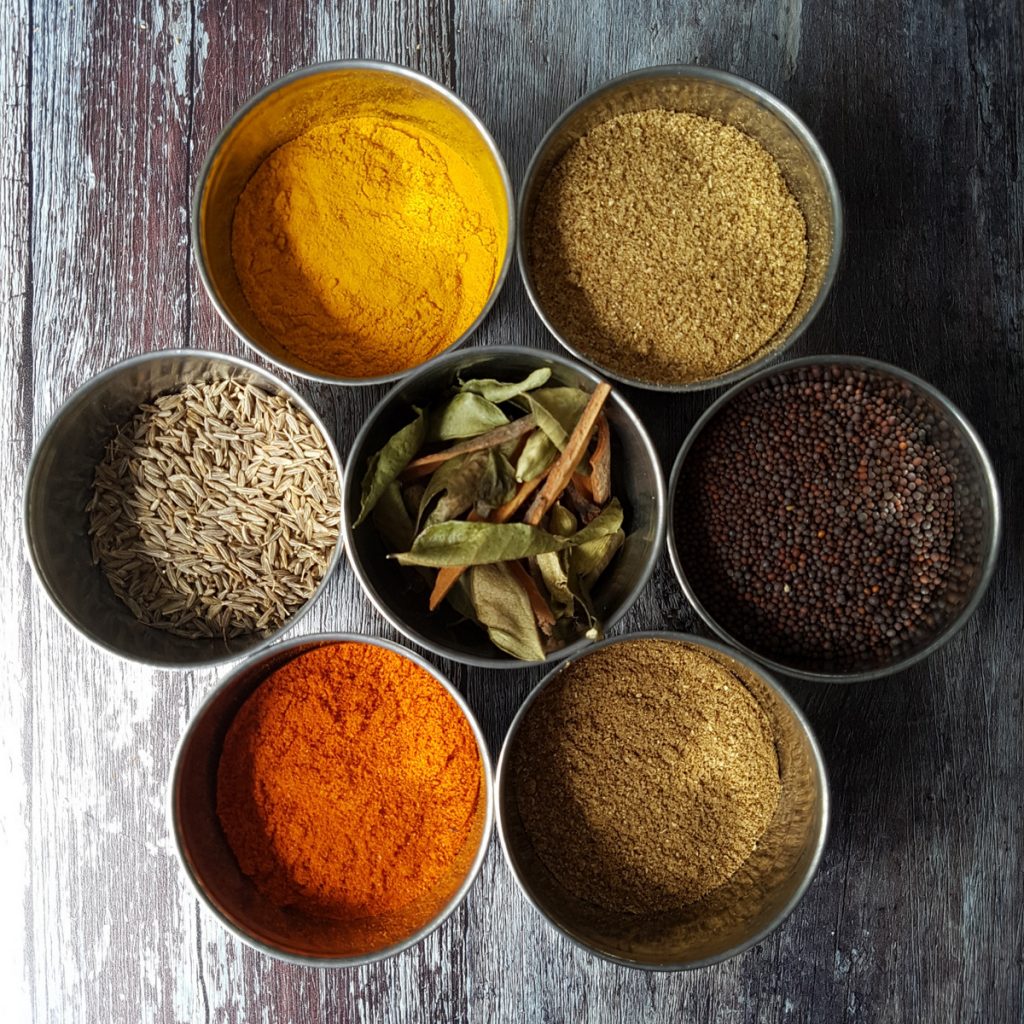
Above I used black foam board to the right AND to the left, to block out some of the natural daylight. But it looks so flat and dull. More daylight is required to create highlights and shadows.
So I went back to my original set up and had a think. I still wanted more contrast - more range between highlights and shadows. The only way to do this was to open the net curtain and allow direct light (but not sunshine) to fall onto the set up.
Bingo! Sort of... this shot has really come to life in terms of contrast, but the bottom left is really bothering me - much too bright.
I still wanted the side light to hit the spice tins and retain all that lovely contrast, but I needed to block out the light bottom left. So I angled a second piece of black foam board just across that area. It made a massive difference and I've got my shot. I've lost a little contrast but I'm happy I can edit the shot and bring that back.
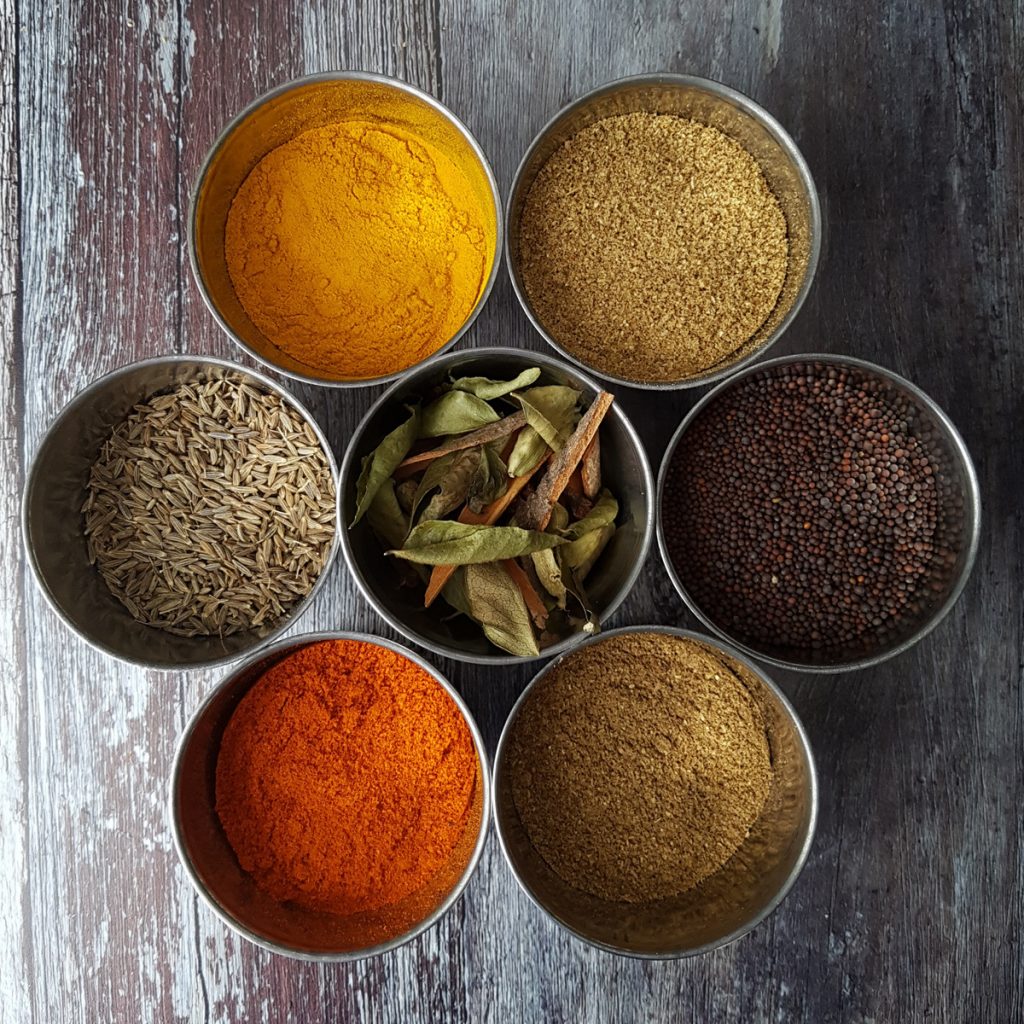
Below is the final edited shot, using the wonderful and free Snapseed app to add a vignette, adjust the Curves and boost the detail using the Tonal Contrast tool.
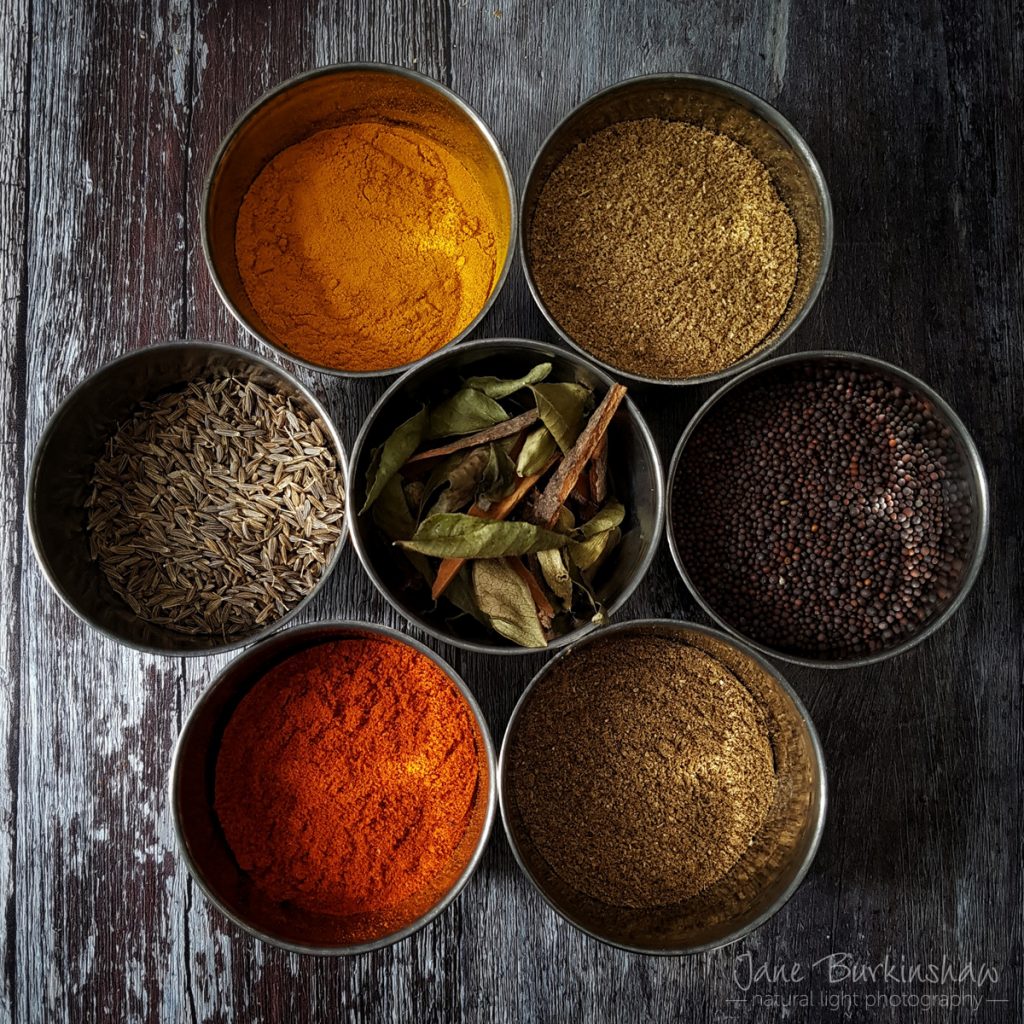
Looks quite good cropped in a bit closer too.
I hope you've found this tutorial helpful and that you go away and have a play with some luscious dark and moody food photographs.
Take a look at my online Food Styling and Photography Masterclass for oodles more information on how to style and photograph food like a professional.

No comments yet.