

Shutter speed 1/2000; f/10; ISO 160. Edited with Photoshop Elements. Tells a strong story about photographers capturing this dramatic sunset in the South West Lakes.
Silhouette images have a certain magic about them don’t they? A simple story told with an outline against a beautiful backdrop, usually a sunset or other beautiful sky. They can be quite difficult to create though, often occurring by chance rather than intention.
Here are some tips:
Shoot towards the sun – but remember that doesn’t mean you have to include the sun in your shot, unless it’s a beautiful setting ball of fire type of sun. You are looking for a very bright background against which your subject will appear very dark. You might be able to hide a very bright sun behind your subject, sometimes by getting down low.
Keep it simple
Pick a strong subject with a clear outline, not overlapping with other subjects or elements in the frame. And watch out for any distractions in the background. This shot below doesn’t work as the girl is partially lost in the dark shadow and her hat is not in a great position against the shoreline and horizon.

In the shot below the two subjects are nicely outlined against the background and the shot feels balanced and somewhat humorous. This is also an example of a silhouette taken in the middle of the day. The bright background is created by the sun shining on wet sand.
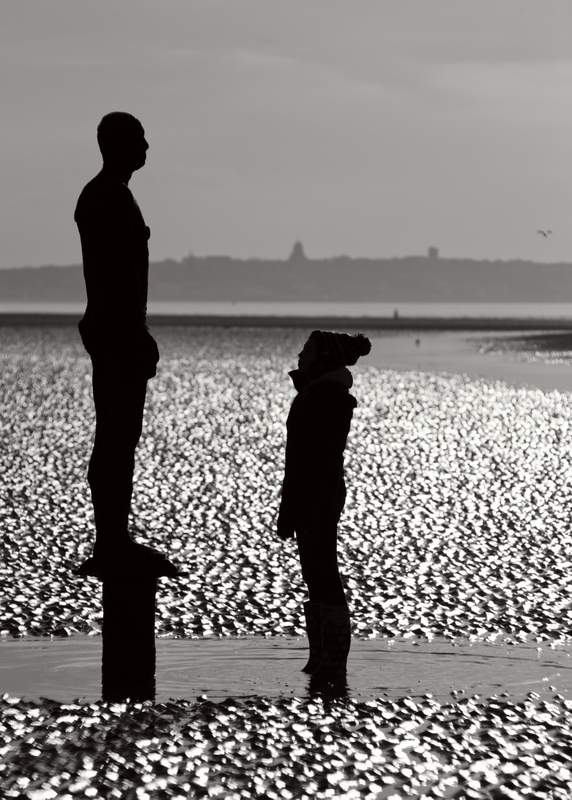
Shutter speed 1/1600; f/8; ISO 160
And even more simple… And in this instance the bright background is water lit by the low evening sun.

Shutter speed 1/110; f/2.8; ISO 100.
Camera settings
When you are photographing a silhouette you need to expose for the bright background and therefore underexpose the subject. Here are some different ways to achieve that:
Ideally you should shoot in Manual Exposure mode, with an aperture of f/8 or higher to give a nice crisp outline and wide depth of field. Keep your ISO as low as possible. Experiment with the shutter speed (increasing it) until your subject becomes dark enough against the bright background.
If you shoot in any of the automatic modes the camera will probably get the exposure wrong as it detects the bright sky or dark subject. If this happens then use the Exposure Compensation setting to darken or brighten the image as necessary.
Alternatively you could try using the Exposure Lock function. You may have to look this up in your manual, but it usually involves pressing the AEL (auto exposure lock) button – often denoted with an asterisk too – then focusing on the bright area and pressing the shutter button. The camera doesn’t take a picture but instead stores the exposure settings and uses them for the next shot you take. So, then you simply frame your shot and press the shutter. See which method works best for you.
If you are using a camera phone find out how to change the exposure and then underexpose (make the shot darker).
Post processing
Try adjusting the contrast to make shadows darker and the highlights brighter. Avoid any filters etc that brighten shadows or darken highlights. In the before and after shots below I simply used Snapseed to make the image black and white and the contrast slider to emphasise the silhouette effect.

Shutter speed 1/320; f/16; ISO 100.
No comments yet.