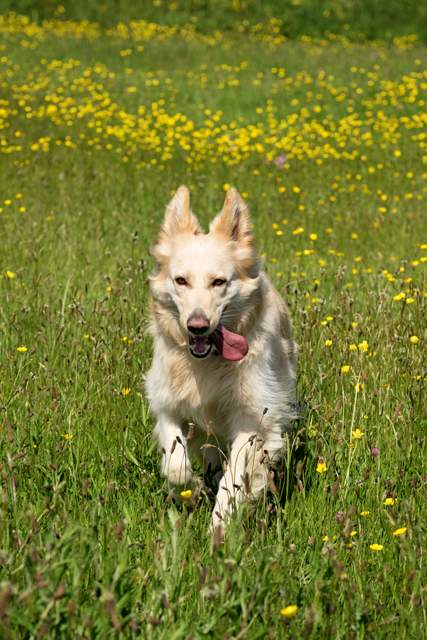
This is a photo I took of a friend’s lovely white Alsatian (Luna?). You might not be able to tell at this low resolution but it is nice and sharp. Although the auto focus on modern digital cameras is awesome, you do need some knowledge on how to take advantage of it to avoid operator error.
Here are some tips and recommended reading:
HOW TO TELL IF YOUR CAMERA HAS FOCUSED ON THE SUBJECT
- One or more auto focus points light up – either green or red squares or dots usually.
- The camera “beeps” to confirm focus is achieved. If you are unsure about focusing then make sure the beep is enabled. I only switch mine off when I want to be super quiet or sneaky!
10 COMMON CAUSES OF OUT OF FOCUS IMAGES
- You were too “trigger happy” – shooting too fast and not checking that your subject was in focus. Slow down and check the above.
- Lens or camera is accidentally switched on to manual focus MF.
- You are too close to your subject. Different lenses have different working distances. Some may focus at 30mm, whereas others focus at 1 metre. Familiarise yourself with the minimum focusing distance for each of your lenses.
- You’ve accidentally got the camera set on AI Servo or AF-C (Continuous Focusing), when you are shooting a still subject. Use AF-S or One Shot for still subjects.
- The shutter speed was too slow for a moving subject. Use the cheatsheet below as a rough guide. The faster the action, the faster the shutter speed. Apparently you’d need to use 1/1000 to freeze Usain Bolt running the 100 metres!
- Remember that the more you zoom, the faster the shutter speed needs to be. If you are shooting at a focal length of 200 (i.e. with a telephoto lens), your shutter speed needs to be at least 1/200, even for a still subject.
- The shutter speed was too slow for a handheld shot. If you are using long exposures (shutter speeds slower than 1/40), you risk getting camera shake. Use a tripod or a stable surface. We will be covering long exposures and night photography separately.
- You are using a very large aperture (low f/number e.g. f/2.8 or lower) and focused on the wrong area of the image. This is common in portrait photography where you are shooting close up and then your subject moves slightly, resulting in out of focus eyes. Try using a slightly smaller aperture with moving subjects.
- Linked to the above is macro photography, where the close shooting distancecombined with a very large aperture (shallow depth of field) results in the wrong area being in focus. To focus precisely you need to use a tripod and either select an auto focus point right over the area you want to be in focus or use manual focus. If you have the Live View facility this is the time to use it.
- You had to use a high ISO number in low light. This can affect image sharpness and there’s no way to avoid it other than use a tripod.
SOME ADDITIONAL TIPS
- Make sure image stabilisation (steady shot / vibration reduction) is enabled on your camera or lens. It’s usually a switch on your lens if it has it or an option in the menu if it’s built into the camera. Switch it off when using a tripod.
- Avoid using the maximum aperture of the lens. Lenses usually have a “sweet spot” (point of sharpest focus) at the next one or two available apertures e.g. for a f/1.8 lens select f/2 or f/2.2 instead of f/1.8.
- Prime lenses (ones that don’t zoom) and more expensive zoom lenses are usually sharper. Nice if you have the budget but always research on Google and take a look at Tamron and Sigma. You could always hire a lens to try before you buy.
- Try using Back Button Focusing – click on the link to see how to do this.
- For fast moving subjects use the AI Servo or AF-C mode. The camera will track a moving subject and keep refocusing. Use in combination with burst mode (continuous shooting) as I did to capture this shot of Julia’s lovely dog.


No comments yet.