

How to get blurred backgrounds in photos is high on the list for people who want to take better images and it’s one of the things that distinguishes good pictures from snapshots. It can be easy to achieve but if you really want to understand what you are doing and how to control the amount of blur, you should read on.
Depth of Field
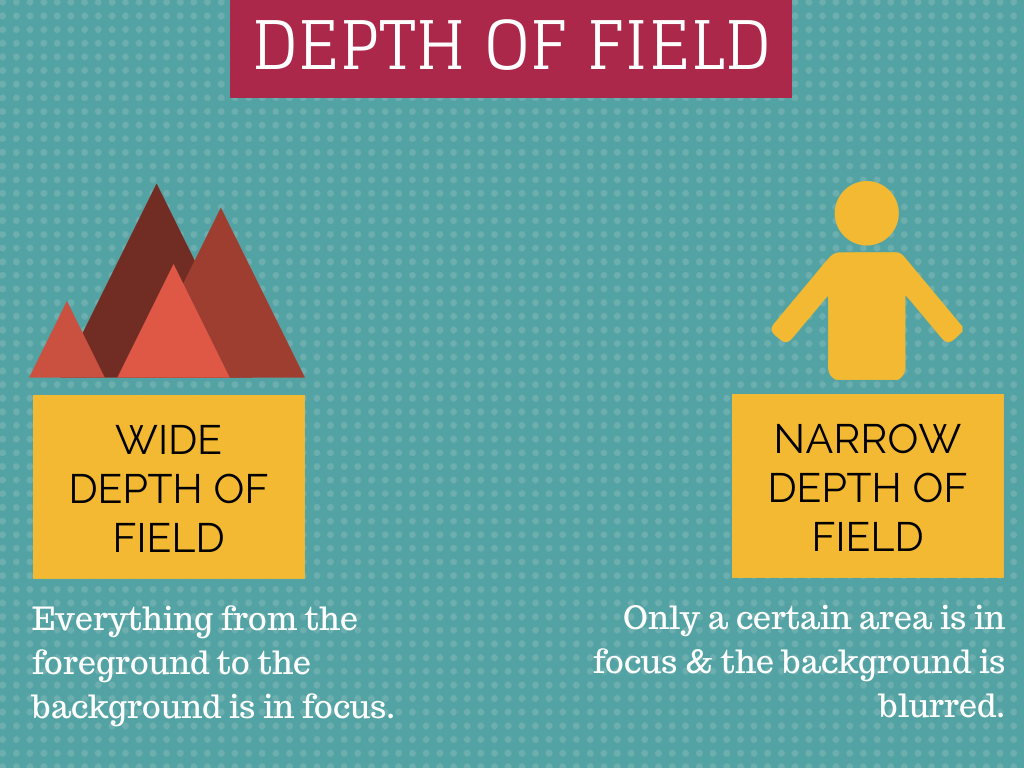
The blurred background in photos actually has a correct name – Depth of Field. How much of the photograph is in focus from the foreground to the background. If it is all in focus the picture has a wide depth of field. If only a certain point is in focus and the background* is blurred, this is known as a narrow depth of field.
Landscape photographers often want to achieve a wide depth of field, whereas portrait photographers often want to use a narrow depth of field to make their subject stand out.
There are 3 things that determine how blurred the background is in photographs
- Aperture
- Focal Length
- Distance (from you to your subject)
With the help of a family of meerkats we’re going to look at all 3 and hopefully it should be “simples”! Today it’s the turn of the Aperture.
1. Aperture
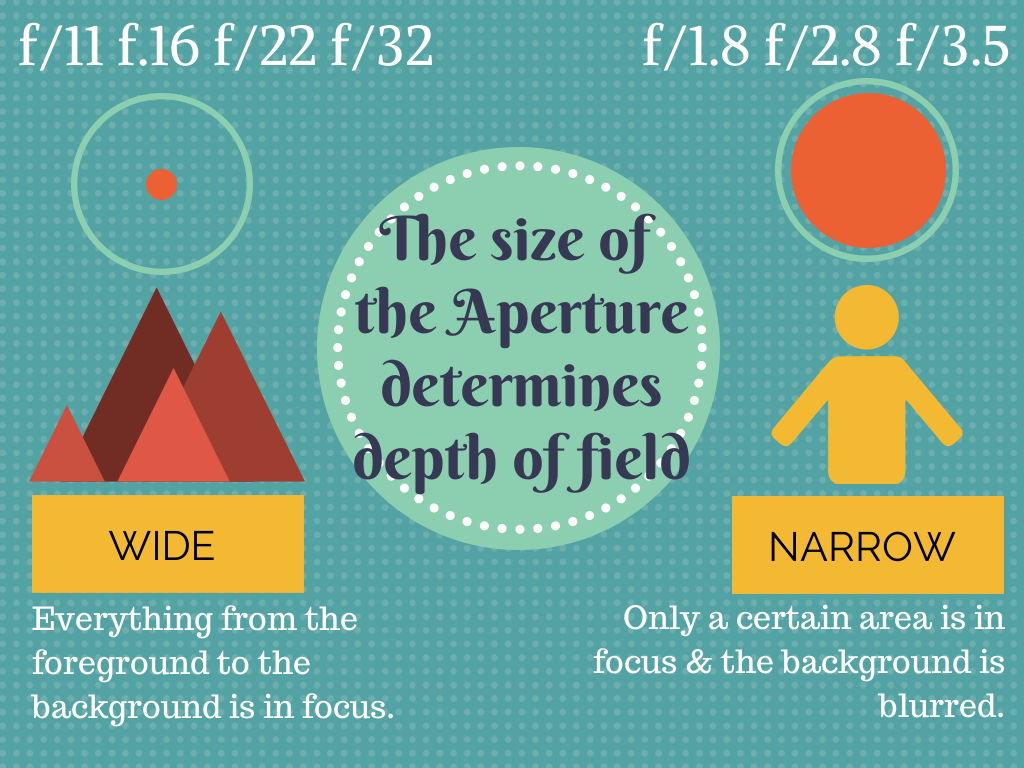
The Aperture is the size of the hole in the lens, when you press the shutter button. The size of the hole is measured in f/numbers e.g. from around f/1.2 to around f/32.
A big hole makes the background blurred i.e. narrow depth of field. A big hole is a low f/number.
A small hole makes the picture in focus from foreground to background i.e. wide depth of field. A small hole is a high f/number.
To set the Aperture you choose A or Av on your mode dial. To get a blurred background you set a low f/number.
Each lens has a minimum f/number. On cheaper zoom lenses the smallest aperture might be f/3.5, whereas on a more expensive lens or a fixed lens it might be as low as f/1.2.
On a cheaper zoom lens the minimum aperture available changes as you increase the focal length (as you zoom). For example on my Canon kit lens, at 18mm (wide) the minimum aperture is f/3.5, but at 55mm (zoomed in) it is f/5.6. You can’t do anything about this, it just changes as you zoom. Some more expensive lenses maintain the same minimum aperture at different focal lengths. This is highly desirable, as it means they let in lots of light, use faster shutter speeds and give lots of blur.
Let’s meet our family of meerkats – they’re not the real thing I’m afraid as they’d have a tendency to run off. There is a dad, but he falls over and I didn’t want him to fall into the pond!
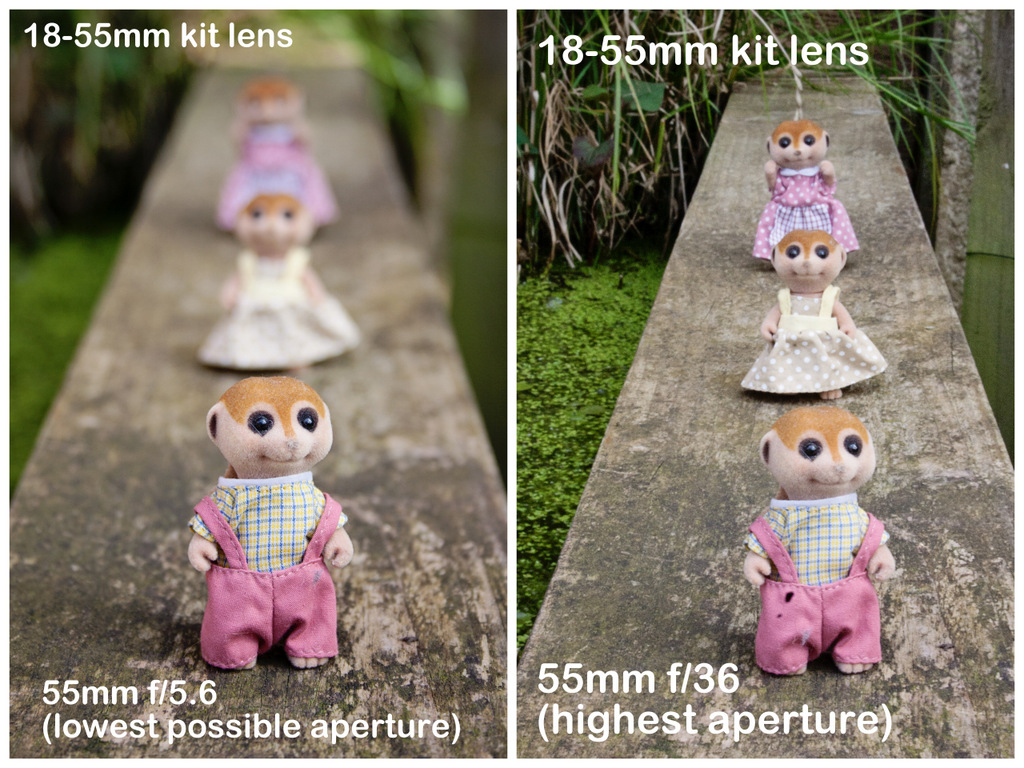
These images were all taken with a 18-55mm kit lens – cheap and cheerful and perfectly good at blurring backgrounds as you can see. I shot these at the full extent of the zoom i.e. at 55mm. This meant that the lowest aperture I could get was f/5.6. The two meerkats at the back are nice and blurred. The same shot at f/36 (small hole) has brought the other meerkats into focus too. But the sharp eyed ones amongst you may have noticed that they are not completely sharp. Why is that, when we’ve used a really high f/number?
Let’s compare two pictures taken with the same lens again.

Both of these are taken on the lowest possible aperture with the same lens, but the one with the lowest aperture of f/3.5 is noticeably less blurred than the one on the right with f/5.6? Again, the sharp eyed amongst you will have noticed that the focal length is different. Part II looks at how Focal Length also has a big effect on depth of field.
Did you like this blog post or find it useful? If so, please leave a comment, sign up for email reminders at the top of the page or share it with your friends (or even better, all three!!). Thank you – Jane ![]()
Having bought my 1st DSLR in the last 2 weeks and disovering my A level physics optics knowledge doesn’t help me in the slightest when it comes to taking a decent photo- this article has proved to be really easy to get my head round.
I love the infographic- useful for memorising the theory and the compare and contrast photos. The compare and contrast photos gave me a light bulb ‘Ah now I know what it does’ moment.
Knowing what aperture is and how it actually affects photos are two different things for me-I think this will help me dovetail them. Thank you Jane.
Now out to play with new toy!
HI Fiona, Sorry for not replying sooner. Glad you liked it and found it helpful. Go enjoy your toy and send me some pics :-)Jane