
I absolutely love it when one of my clients sends me pictures they’ve taken that show what they’ve learned and how confident they now are with their camera. I had a great email from new mum Louise today. She attended a Let’s Shoot The Kids course in January and has recently given birth to baby Edward. These are the fantastic photographs she sent me, showing she really knows how to photograph a baby!
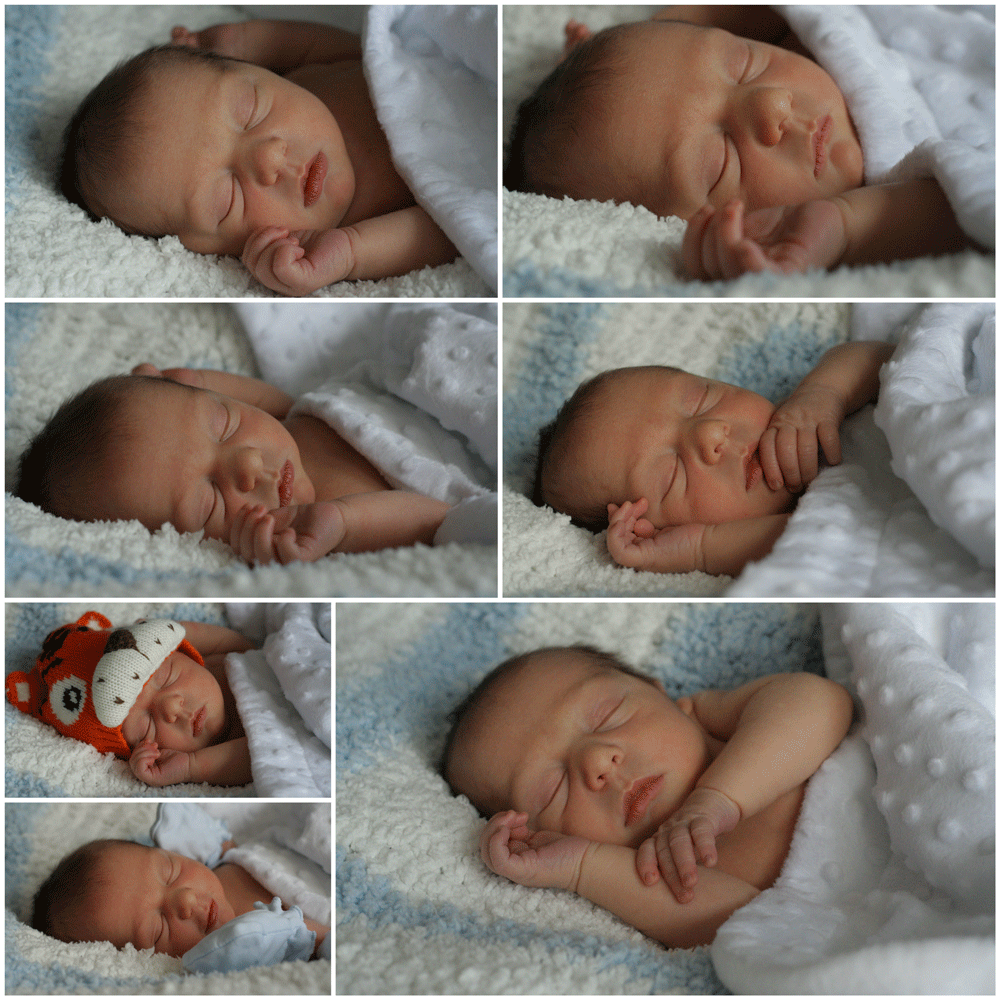
Baby Edward photographed by Louise
I selected three to do a quick Photoshop edit on for her. It was hard to pick as they are all lovely but in the end I went for ones where his little hands were visible but not obscuring his face. I think bottom left from the above collage is my absolute favourite but here are all three that I edited.
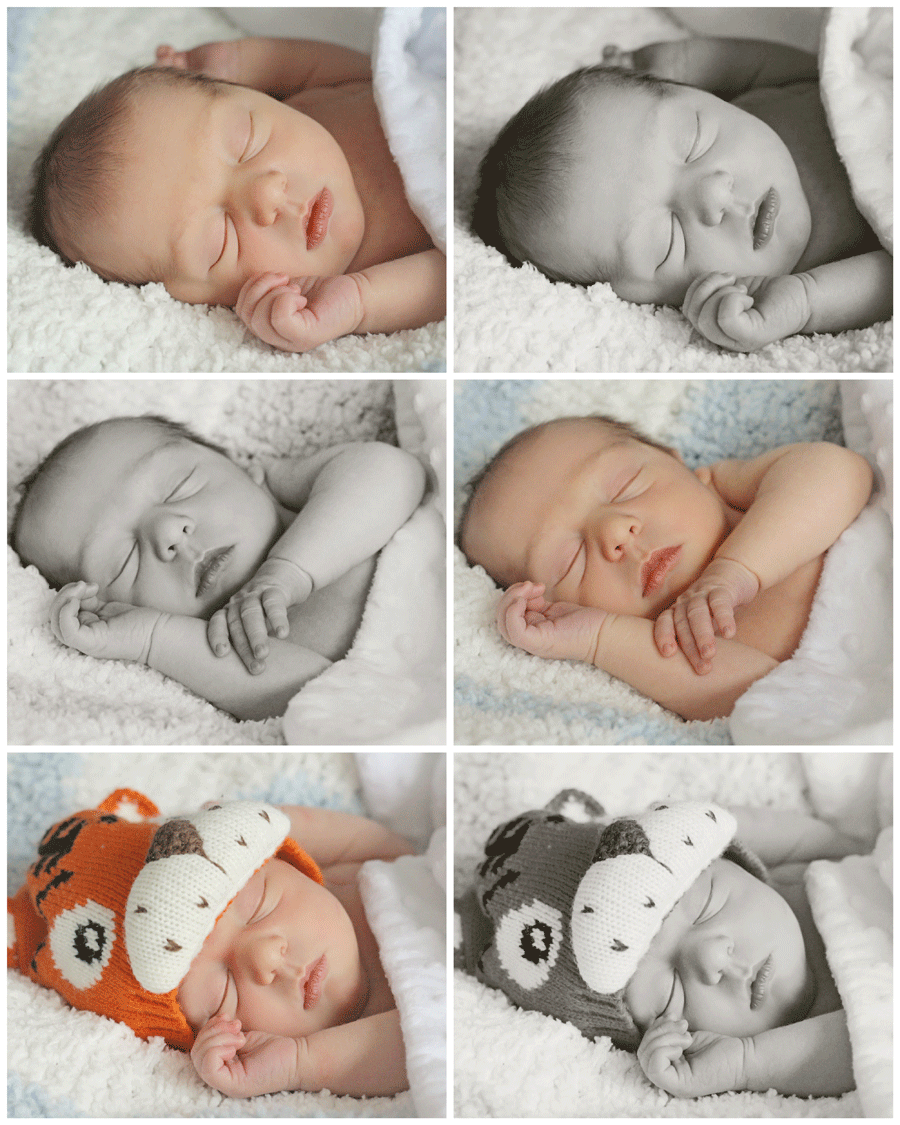
Louise’s images after my edits with Photoshop Elements
Louise has done a great job in camera of capturing beautiful shots of Edward sleeping. She used a Canon 350D with 50mm f/1.8 lens, absolutely perfect for this sort of shot as it lets in lots of light and gives lovely blurred backgrounds. The original images are slightly underexposed and there’s a little bit of noise (speckliness in the shadow areas) and when I checked the camera data I could see that Louise had used a shutter speed of 1/400 and ISO 1600. I’ve advised her to use a slower shutter speed of 1/80 or 1/125 next time and this would allow her to use a lower ISO setting to reduce the noise. But, as you can see, still a great job and nothing that couldn’t be easily corrected with some editing.
So, here’s how I edited the images. As these were JPEG files, not RAW, I opened them up in Photoshop Elements (if they were RAW I would have opened them in Camera RAW and been able to do a little more work on colour and exposure). Step by step, here’s what I did then:
- Cropped the image to either 8X10 or 5X7 depending on which worked best.
- Created a LEVELS layer and brightened the image and lightened the midtones too to soften the contrasty areas. I always like my newborn pics to be soft and subtle, not all punchy and contrasty.
- Used a skin smoothing action (actions are automated steps that save time when editing), which I painted on to his face and then adjusted the intensity so that it looked natural.
- If there had been any blemishes or spots I would have removed them but there weren’t any – he’s so perfect!
- Used an action that does a whole load of things – the main ones being brightening, softening, warming, giving great skin tones. These actions cost money but they are so awesome and I adjust them to give the results I want.
- I then ran – you’ve guessed it – a black and white action and applied a soft vintage tone.
- I then tweaked the contrast
- Finally I ran yet another action that reduces noise.
So I think Louise should be pretty pleased with herself. Even without the edits these are lovely photographs.
I run courses and offer one to one tuition to beginners and improvers, including Let’s Shoot The Kids, and an Introduction to Photoshop Elements, so if you’d like help getting to grips with your camera then click on the links and take a look.
Did you like this blog post or find it useful? If so, please leave a comment, sign up for email reminders at the top of the page or share it with your friends (or even better, all three!!). Thank you – Jane ![]()
No comments yet.