

5 family photo shoot tips
We all want lovely photographs of our family don’t we? And as our children grow older, we can foresee the day when they will have left home to pursue lives of their own. This was the case with this lovely family, where the oldest daughter will be heading off to university next year and her parents were keen to capture the children together.
However, a family photo shoot can be quite challenging, even when the kids are older and willing (-ish!) to pose together. I’ve learned how to make things go more smoothly over the years and if you follow these family photo shoot tips you will make things a lot easier for yourself.
1. PLAN ahead
This is key! So many things can go wrong before you even pick up the camera, so a little planning goes a long way.
- Plan with the family what sort of shots they are looking for. I use Pinterest to create a mood board and I ask the family to add images to it as well. Here’s the one created for this shoot.
- Ask the family to plan what to wear. I keep this really simple:
- No strongly branded clothes.
- No busy patterns.
- Something each person feels good and comfortable in.
- Pick one colour that everybody has on them somewhere. With this family it was burgundy, although there was a rebel in the ranks (it didn’t matter!)
- Plan where the photo shoot will take place. It doesn’t matter whether it’s a location that is special to the family or somewhere that you are familiar with and know it has some great locations.
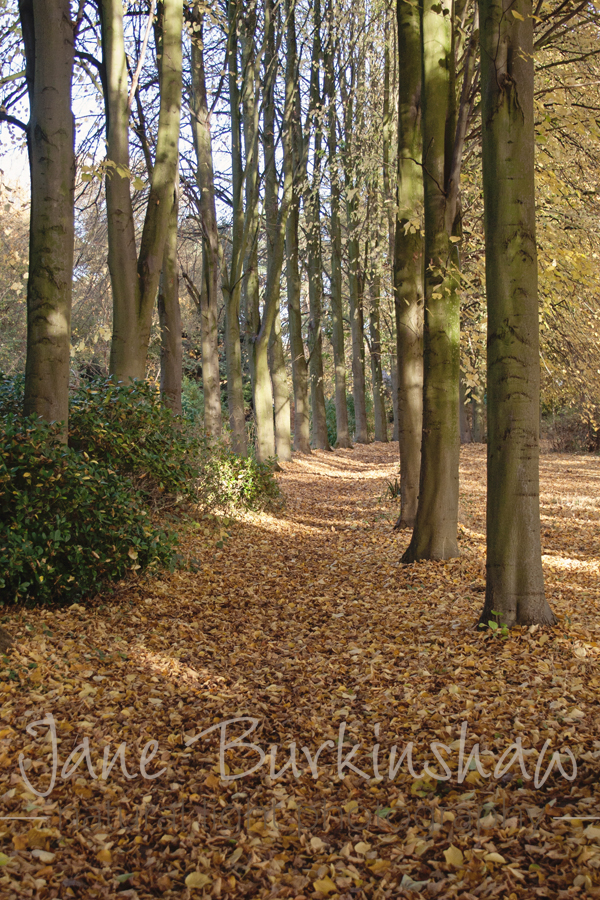
I spotted this area before the family arrived and used it for several shots.
- Check that each spot you use (I picked out about half a dozen) provides a nice backdrop, whether in focus or blurred out. At this time of year it was almost impossible to pick a bad spot!
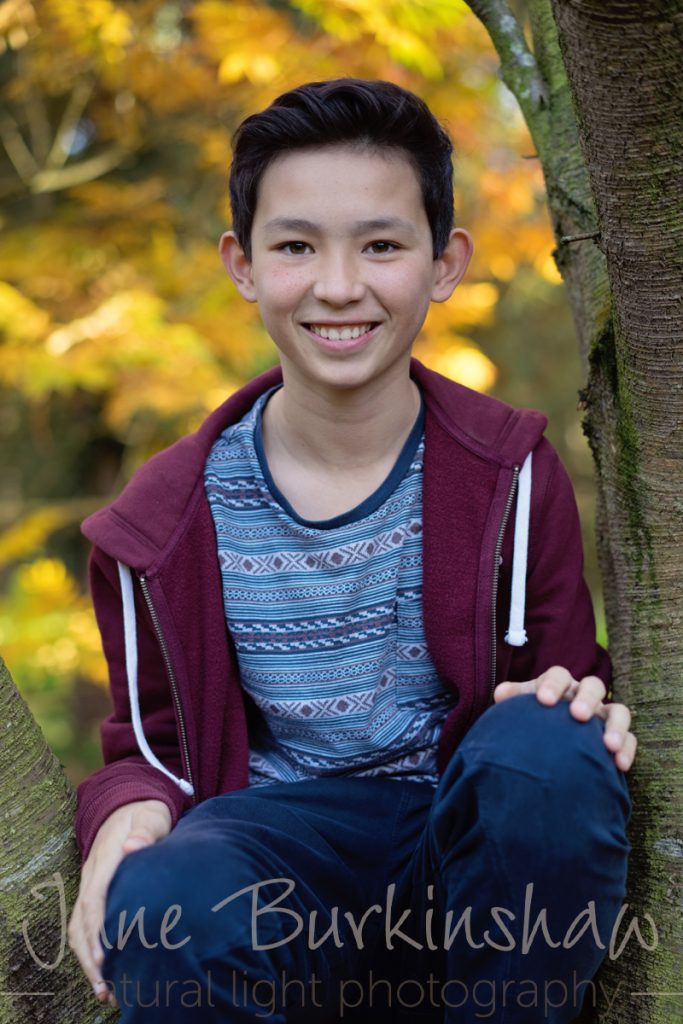
This boy is facing towards the light but in the shade and the sunlight is falling onto the golden Autumn leaves behind him.
- Plan when it will take place. I knew that the light would be amazing in the afternoon between 2.00-3.00pm in this arboretum and it was! The light is what it’s all about and will transform photos from flat snapshots to truly beautiful images. It’s also about the weather of course. This requires a great deal of luck, especially in the U.K. This late October day, mid afternoon, sunny skies and a chill in the air was picture perfect! Sunny days can be quite tricky with harsh light and shadows unless the sun is low in the sky. Overcast days are good as the light is soft and colours more vibrant.
2. POSING
Everyone will look to you as the photographer to guide and instruct them how to pose and it can feel quite stressful if you haven’t thought about it beforehand. Personally I don’t over-pose people, preferring to suggest to them where to stand or sit and then making small adjustments. I tell people what I’m going to do and what I expect from them. Here’s some helpful suggestions:
- Before you even start to pose anyone in your chosen location, check which direction the light is coming from. If it’s not obvious then hold up your hand and check which side is lighter! Face them towards the light but not in direct sunlight.
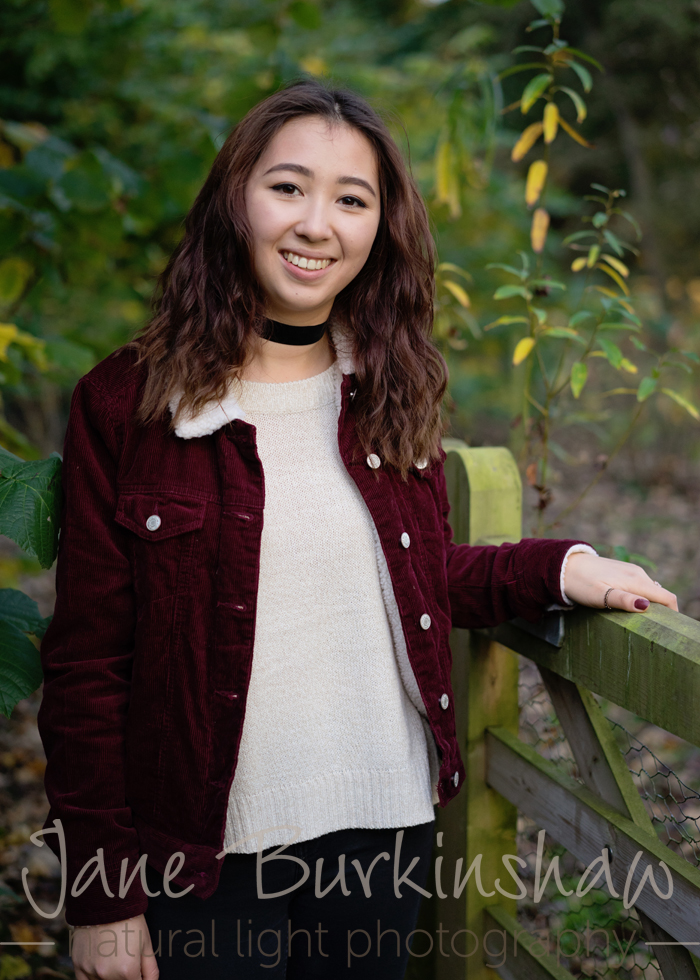
In this image the young lady is facing towards the soft, filtered afternoon light and it makes her skin positively glow.
- Tell them that they need to stand / sit closer together than they normally perhaps would, to the extent that their bodies or arms, or heads, or hands are somehow in contact with the person (people) next to them. Gaps in group photos look awful, like the people don’t know or love each other!
- You can arrange people in height order if you like, particularly if there are some big discrepancies, but I prefer my family shots to look more natural and comfortable. I usually put mum and dad in the centre and arrange the children around them.
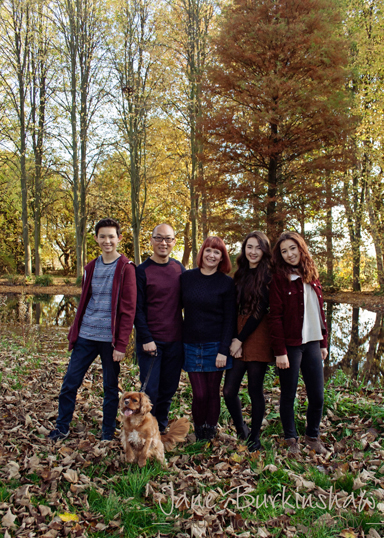
Everyone in this shot is leaning on or touching each other in some way to create a close family unit.
- Find places where the family and individuals can sit or lean, as this makes people feel much more comfortable and less self-conscious.
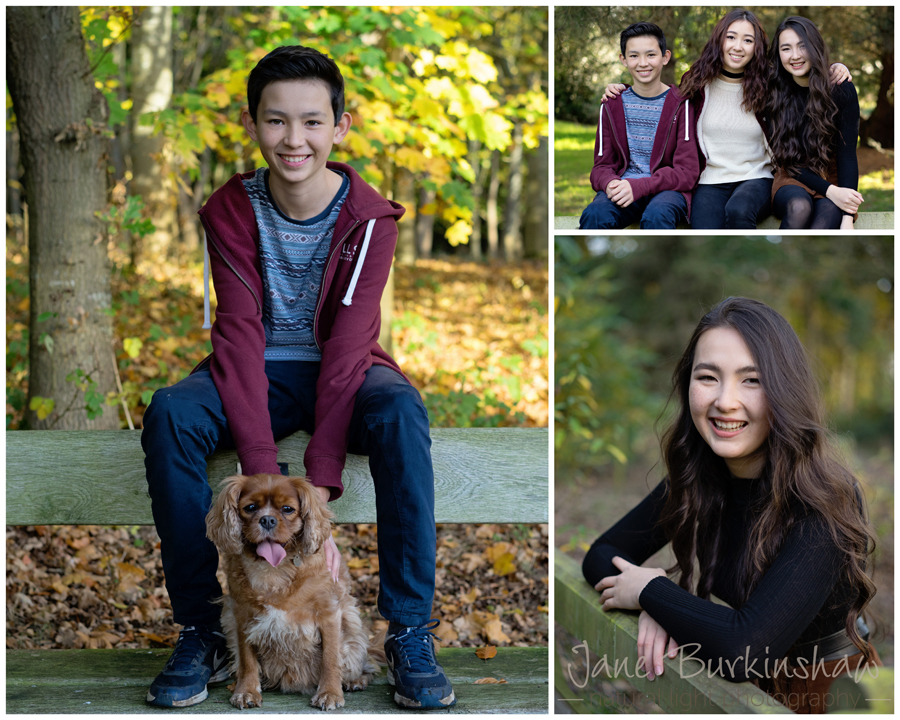
These children were quite awkward and uncomfortable until I found them somewhere to sit or lean.
Once I’ve got people in position and facing the right direction I concentrate on engaging them and getting natural smiles and laughter – more on this in the next section.
- Movement in shots can work really well and will also help people to relax and feel less self conscious. I asked the family to walk towards me, holding hands and talking to each other and smiling. We did several takes to get enough shots to choose from. Remember to ask them to walk towards you very slowly. In the next section you can see how play also creates movement.
3. PLAY
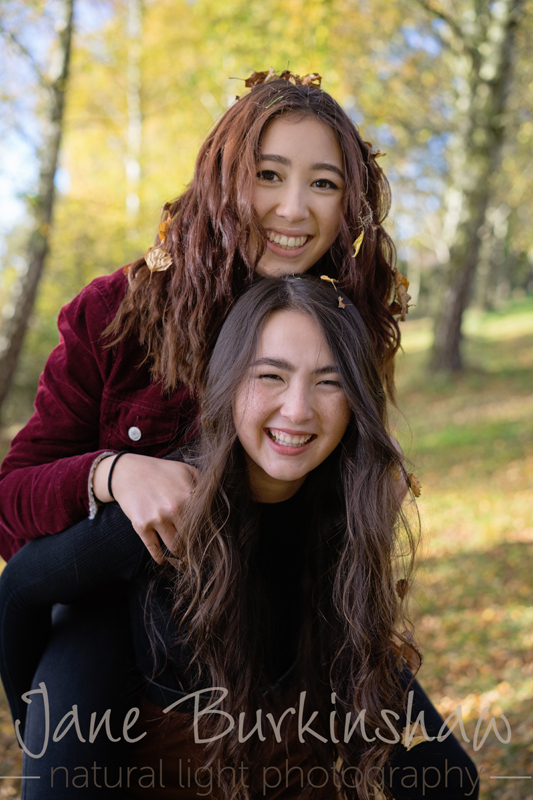
The sisters couldn’t help laughing when they were giving piggy back rides to each other.
You should expect that the family will be quite nervous and unused to having their photographs taken by strangers. It’s your job to make them feel at ease and the better you are at doing this the more natural the images will be.
Here are some suggestions to help people relax a bit:
- Keep the conversation flowing all the time, even when you are concentrating on camera settings or looking at the picture you’ve just taken. A silent photographer makes people nervous.
- People’s smiles can get very fixed after a while, so ask them to stop smiling and pull a few funny faces to exercise their face muscles from time to time. And have your camera ready to capture spontaneous laughs as they do this!
- Make sure you are relaxed and prepared to make them laugh at you. You have to gauge this for each family and decide what will work.
- Encourage play. I got the girls to carry each other piggyback whilst their younger brother threw leaves at them and then they got their revenge on him.
- Who can resist kicking their way through Autumn leaves? This provided another great photo op but I had to keep reminding them to look up.
- Don’t let boredom set in. If a particular shot doesn’t work well or if you’ve been in one location for a little while move on to some where different.
4. PRIME
Now we’re going to take a look at kit, particularly lenses, as they make all the difference. Firstly a quick word on cameras.
You can get reasonable results with a compact or bridge camera but they do have their limitations.
- They tend not to perform well in low light and conditions on an Autumn afternoon in a wood are likely to be exactly that. To keep your shutter speed fast enough to avoid blurred photographs you will have to keep increasing the ISO, which will impact on image quality.
- You will also struggle to achieve the soft focus backgrounds (shallow depth of field) that looks so lovely in portraits.
- Focusing on moving subjects may also be slower.
For best results you need a D-SLR or mirrorless camera. These are cameras with interchangeable lenses, with the mirrorless variety being lighter and smaller. I shot most of these images on a Sony A7 mirrorless camera, the equivalent of a professional level, bigger and much heavier D-SLR.
The kit lens (18-55mm) will do a decent job for you but you may experience some of the problems outlined above for compact and bridge cameras. Make a small investment in a prime lens and you will really reap the benefits. Prime lenses don’t zoom and give sharper and clearer images.
For a few of the wider family shots I used a trusty old Canon 350d and kit lens (to cut a long story short I carelessly lost my Sony 28-70mm lens a few weeks back!) and I can really see the quality difference. This older camera lacks the ISO and dynamic range of my Sony A7 and the kit lens gave me all the issues listed above.
A 50mm f/1.8 lens is usually low cost (around £100-£150) depending on brand and a huge asset to your kit. The large aperture of f/1.8 will help you to keep shutter speeds fast in low light, without having to increase the ISO so much. However, f/1.8 isn’t always ideal for portraits so take a look at Pick Your Settings below.
On an entry level D-SLR or mirrorless camera the 50mm lens will actually have a focal length of around 80mm, which is perfect for portraits. This difference is due to using the lens on a camera with a cropped sensor (also referred to as a two thirds or APS-C sensor). If you have a full frame camera 50mm is 50mm and is still a great focal length for portraits. I used a Sony FE 55mm f/1.8 Zeiss lens for the close up shots in this shoot.
A zoom lens with a longer focal length can also be very useful for portrait shoots as it means you don’t have to be in your subjects’ faces, shooting instead from a distance. Cheaper zoom lenses can struggle in low light so you need to know your lens’ limitations and use it accordingly i.e. choose brighter areas. I used a Sony FE 70-200mm f/4 lens for the shots where the family are walking or running towards me. This lens is “fast” meaning that I can use f/4 even when I’ve zoomed right in to 200mm – cheaper lenses will “lose light” as you zoom.
5. PICK your settings carefully
Set the Exposure Mode (on the mode dial)
For great portraits get off the AUTO modes and select the Aperture Priority mode. I think of this as the creative mode as it allows you to control the depth of field (soft focus backgrounds). Select a low f/number (big aperture) like f/2.8. Then all you need to do is keep an eye on your shutter speed and if it’s too slow, you increase the ISO. I bear in mind that these are the minimum shutter speeds I need:
- 1/125 for a stationary person
- 1/250 for a strolling person
- 1/400 for a jogging person
If you are relatively new to using the Aperture Priority Mode and ISO take a look at this blog.
If you are using a prime lens that allows you to use a really big aperture like f/1.8 or f/1.4, a word of caution. This is a very shallow depth of field i.e. only a small area of your image may be in focus. It’s very easy to get the wrong area in focus, especially if your subject moves at all. This problem is more likely the closer you are to the person. You could easily miss getting the eyes in focus, a dead certain way of ruining any portrait. If you are photographing groups of people they will often not be quite on the same focal plane and you risk getting anyone standing slightly behind out of focus.
In addition to this most lenses are known not to be at their sharpest at the biggest aperture and it’s best to increase the f/number slightly. For portraits I usually range between f/2.2 and f/3.5 with my prime lens.
Set the Auto Focus Area
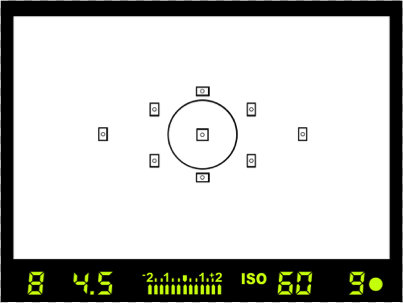
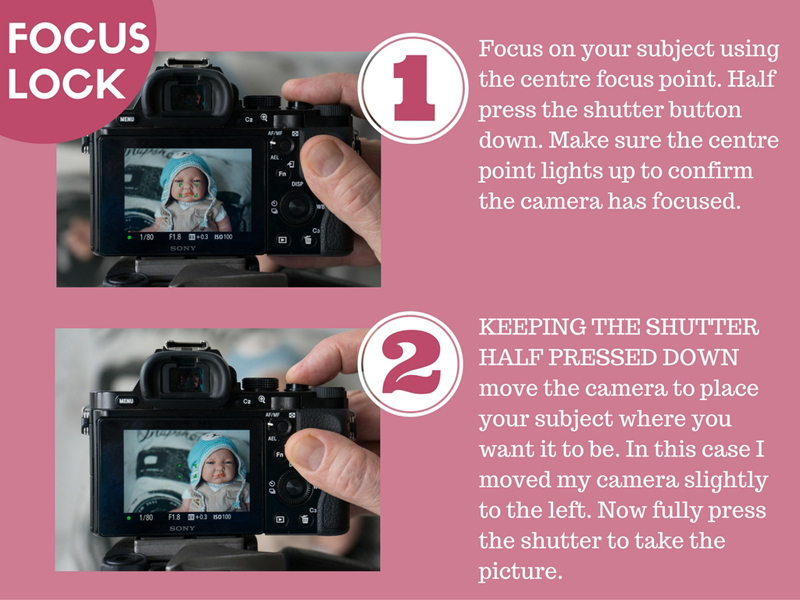
Set the focus point to the centre, rather than leaving it on AUTO. You are then in charge of where the camera focuses and you can use the focus lock method to compose your shot. This allows you to put your subject off centre and create more dynamic compositions.
Set the Drive Mode to Continuous Shooting
You might know this as burst mode. I tend to use this mode for portrait shoots so that I capture every moment and can select the best shot later.
Set the Auto Focus MODE
This sets HOW the camera will focus. You have three options and the table below describes when to use them. (It was created for a blog about babies but is still relevant for families!)
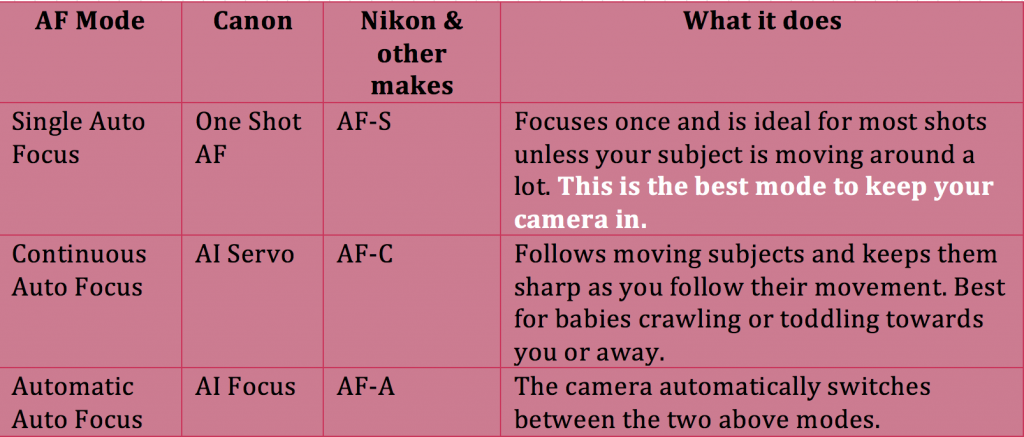
ONE Shot for relatively still subjects and AF-C for people moving towards you or away from you.
White Balance
I’d advise leaving this set to AWB (auto). If you are a beginner then the chances are the camera will get it accurate enough for you. If you are more advanced then use AWB but shoot in RAW file format so that you can fine tune it later.
There are lots of other camera settings we could get into but these are the most important ones.
This might all sound like a lot of camera settings to remember, but once you set most things up then you can leave them alone. You will need to keep changing the ISO, perhaps adjust the f/number for different creative effects and the focusing mode for moving subjects.
Of course, the shoot doesn’t end when I’ve taken the last picture. Editing forms a very important part of the process for me, but that’s a whole different blog. In the meantime take a look at PicMonkey – a website with lots of free editing options as well as some premium paid for features.
I run courses in photography and in editing and I also offer one to one tuition. I hope you’ve enjoyed this post and found it useful.
A really useful post, Jane. Thanks.x
Hi Emma – glad you liked it x